Team Player Font Review for Embroidery Projects
First Impressions of Team Player
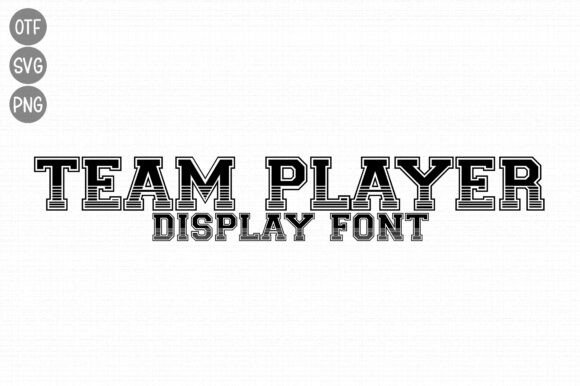
When I first saw Team Player, I immediately felt a surge of energy. It's a display font with a bold, athletic vibe that screams sports and strength. The chunky, stencil-like design feels like it was made to stand out—perfect for making a statement on any embroidered item. Its structure is clean yet powerful, giving off a sense of reliability and confidence.
The mood it creates is dynamic and forward-thinking. It’s not just a font; it's a visual punch. It makes me think of team logos, sports gear, and custom apparel that needs to grab attention. This font has the kind of presence that can elevate a simple tote bag into something memorable or turn a basic sweatshirt into a standout piece.
How Team Player Performs in Real-Life Embroidery Situations
I’ve tested Team Player on several projects, including a custom embroidered tote bag and a baby onesie. On the tote bag, the font looked strong and clear, even from a distance. The stenciled look gave it a professional finish that would appeal to customers looking for quality and uniqueness.
On the baby onesie, however, I had to be careful with the hoop size and stitch density. While the font still worked well, I noticed that smaller hoop sizes could cause some distortion if not handled properly. It's important to test the design on scrap fabric first to see how it behaves under different conditions.
Team Player also looks great on caps, patches, and aprons. The engraved style works well with satin stitches, creating a polished, almost metallic appearance. For commercial embroidery, this font is a solid choice for branding, especially for small shops or Etsy sellers who want their products to stand out.
It’s worth noting that this font shines best on lighter fabrics where the contrast between thread colors and fabric texture is more visible. Darker fabrics may require a higher stitch density or a different thread color to maintain clarity.
Where to Use Team Player with Caution
While Team Player is versatile, there are situations where it might not perform as well. For example, using it on stretchy fabrics like jerseys or knits could lead to slight misalignment during stitching. A proper stabilizer is essential in these cases.
Also, when working with small hoop sizes or detailed corners, the chunky nature of the font might become too dense. This can create issues with stitch flow and overall aesthetics. Testing in black and white mockups before finalizing the project is a good idea to ensure the design translates well in all lighting conditions.
For tiny lettering or decorative accents, I’d recommend scaling back the font or using a complementary design element to balance the composition. Team Player is best used as a focal point rather than an accent.
Visual Appeal and Practical Impact
Team Player adds a lot of visual appeal to any embroidery project. It brings a sense of professionalism and creativity, which can significantly enhance the value of handmade products. Customers are more likely to trust and appreciate items that look well-designed and thoughtfully crafted.
For craft businesses and Etsy sellers, this font can help establish brand consistency across merchandise. Whether it’s a holiday gift, personalized product, or boutique branding, Team Player can make your designs more recognizable and marketable.
Its athletic theme makes it ideal for sports-related products, but it also works well in other contexts like nursery decor, kitchen towels, and pillow covers. The key is to match the font with the right project and fabric to ensure the finished product looks cohesive and high-quality.
Embroidery Designer Notes for Using Team Player
If you're considering using Team Player in your next project, here are a few practical tips:
- Test on scrap fabric: Always check how the design looks and stitches before committing to a final product.
- Check thread color contrast: Make sure the thread color complements the fabric and stands out clearly.
- Review stitch density: Adjust the density based on fabric type and desired effect.
- Confirm hoop size: Ensure the hoop is large enough to accommodate the design without distortion.
- Inspect small details: Look for any areas where the design might get lost or appear too busy.
- Test in black and white mockups: This helps assess how the design will look under different lighting conditions.
- Compare light and dark backgrounds: Choose the right thread color based on the fabric you're using.
- Use proper stabilizer: Especially important for stretchy or thin fabrics.
- Check licensing: Before selling finished items or digital assets, confirm that you have the appropriate rights.
Team Player is a great addition to any designer's toolkit, especially for those looking to create eye-catching, athletic-themed embroidery projects. With the right preparation and attention to detail, it can transform ordinary items into extraordinary keepsakes and commercial products.